To make the most of this tutorial, sign up for Serverless Framework’s dashboard account for free: https://app.serverless.com
Update: This post is based on the beta version of Serverless Components, which is not compatible with the latest, and much faster, GA version. Please check out the latest docs for more up to date information.
Serverless Components are a new way of composing together smaller bits of functionality into larger applications.
Note: If you aren't familiar with Serverless Components yet, here's a quick explainer.
In this tutorial, we are going to walk through building a landing page with the serverless Netlify and Lambda components.
The three components we are using are:
- The Netlify site component
- The AWS Lambda component talking to the Mailchimp API
- The Rest API component, which uses API Gateway under the hood
Let's dive into it and cover:
- Composing Components
- Adding Netlify Site
- Adding the Lambda function for sign up
- Adding the Rest API to expose Lambda function
- Expose the API endpoint to the Netlify site
- Deploy
- Summary
Getting started
First you will need to install the Serverless Components via the npm package:
Set your AWS credentials in your ENV vars:
Note: Make sure you have Node.js 8+ and npm installed on your machine.
Composing Components
This app is comprised of 3 parts: aws-lambda, rest-api, netlify-site.
Let's put them together.
1. Adding Netlify site
We are using Netlify to publish our landing page built with create-react-app.
I chose Netlify over S3 for static hosting because it:
- Builds on github repo events (CI/CD flow)
- Has automatic branch previews on PRs
- Handles redirects out of box via _redirects file 👌
- Handles proxied URLs - this gives us escape hatches for dynamic pages/content
- Is insanely cheap
- Has amazing support to boot
Okay, let's get the component set up.
In serverless.yml we need to define the components we are using under the components key.
The inputs the netlify-site component need can be seen here.
Let's break that down.
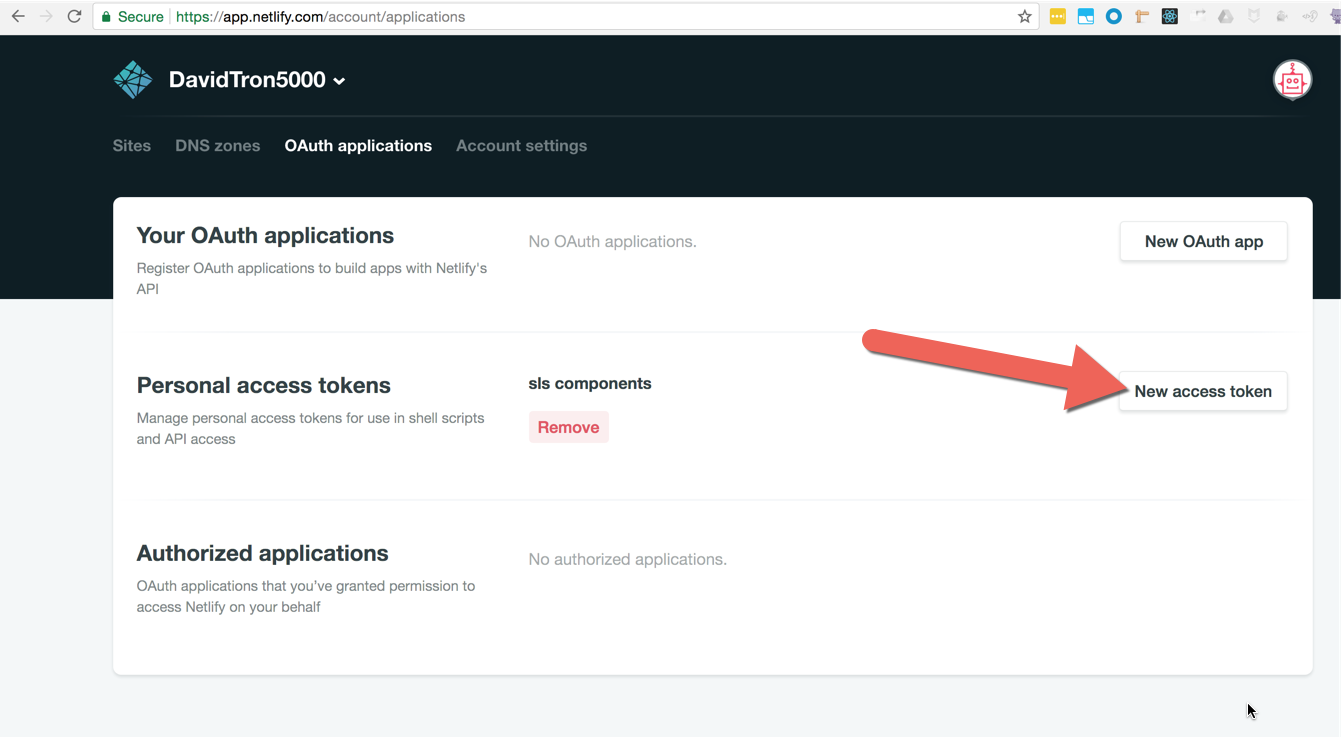
netlifyApiToken is grabbed from your Netlify account at https://app.netlify.com/account/applications, under "Personal access tokens". Replace abc with your valid Netlify token.
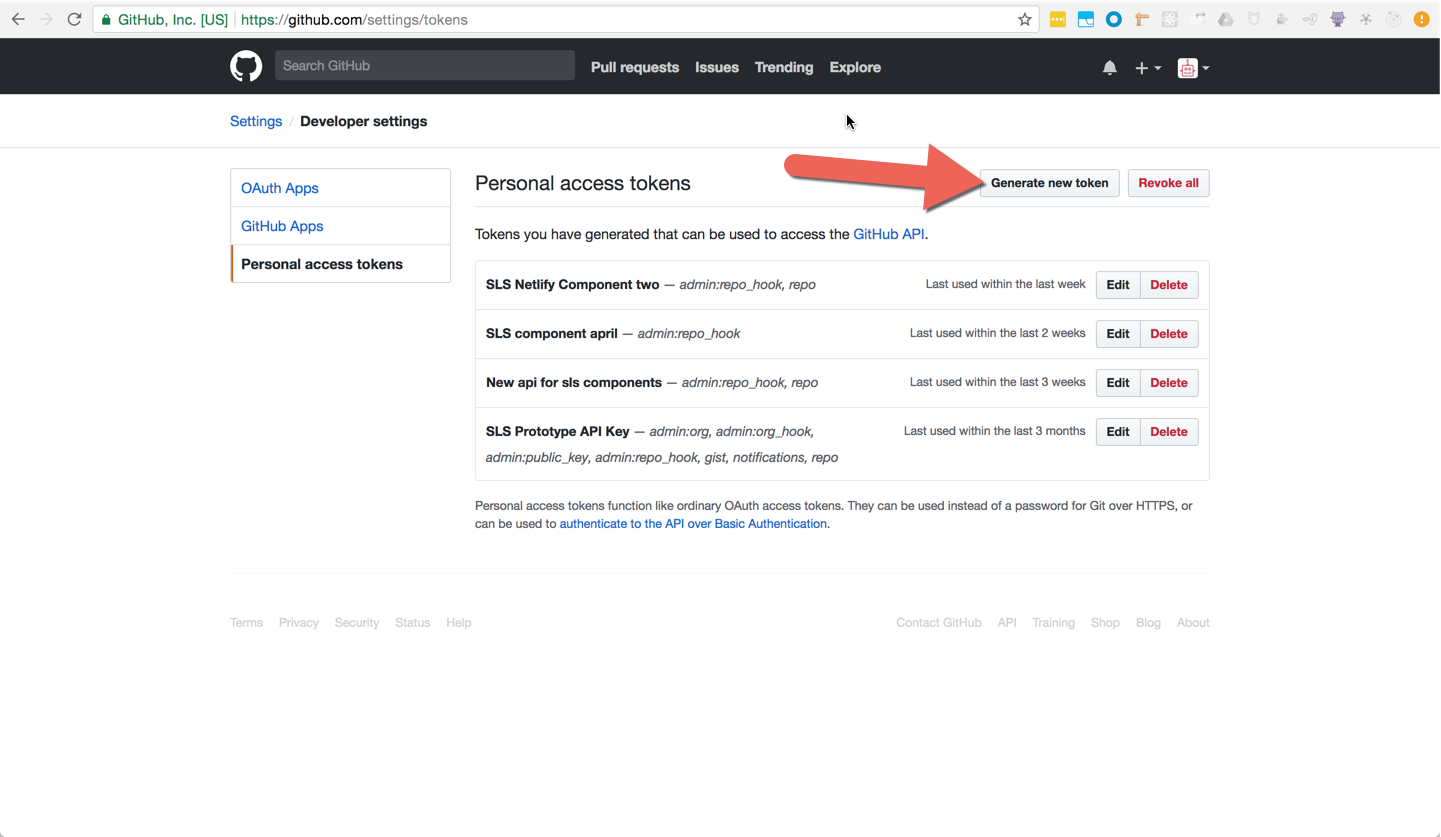
githubApiToken is setup in github at https://github.com/settings/tokens, under "Personal access tokens". The token must have admin:repo_hook and repo access. Replace 123 with your valid github token.
siteName is the Netlify domain you will use for your site. Every site on Netlify lives on a unique Netlify subdomain until you mask it with your custom domain name. Change my-awesome-site-lol-lol.netlify.com to a unique address for your project.
siteDomain is the actual domain name of your site. You will need to configure a CNAME to point to Netlify. If you want to attach your own domain to this example, follow the custom domain instructions.
siteRepo is where your site code lives, and this one is important. You can use any type of site/app that you want in your repo, as long as you give Netlify the build command and where the built site is output. We are going to be using create-react-app to create a landing page.
Our landing page code + repo can be seen here.
siteBuildCommand is the build command for create-react-app. It will compile our React app and output files into the build directory for us. This command will change based on your site/apps build process.
siteBuildDirectory for us is the /build directory. This is the default behavior of create-react-app.
siteRepoBranch will be the branch that triggers a rebuild of our site. Aka, when a change is merged into the master branch, Netlify will automagically rebuild and update our live site.
You can deploy this as it is right now, with:
If you go into Netlify and click into the newly-created site, you should see the live landing page URL
2. Adding the Lambda function for sign up
Now, we need to add a Lambda function to handle our form submissions.
In serverless.yml, add the aws-lambda component to the components block:
Then, create the code for the Lambda function in a code directory:
Inside handler.js, add your Lambda code. The code/handler.landingPageFunction references the hander.js file with the exported landingPageFunction function:
Now, we need to expose the env variables for the function to consume.
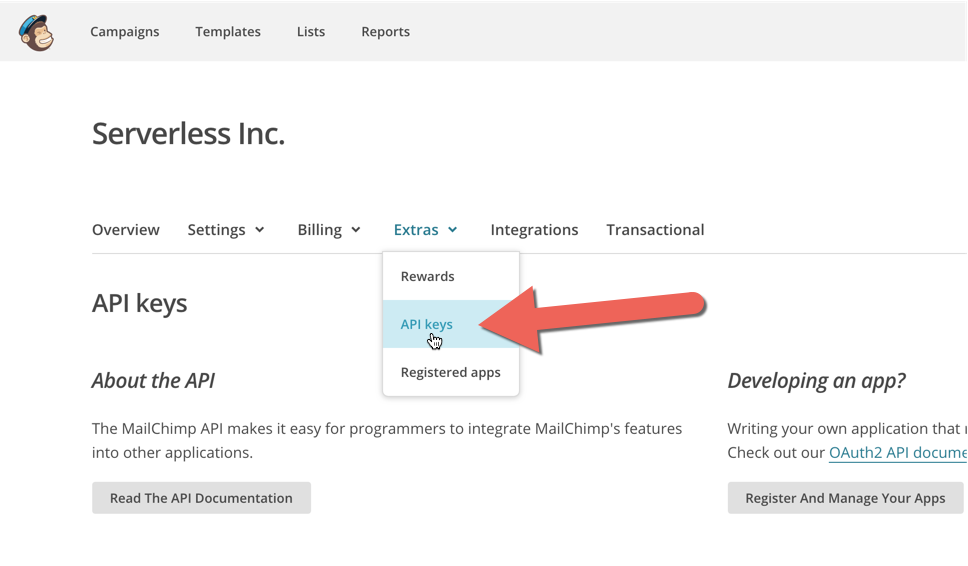
You can grab your Mailchimp API keys under "Account > Extras":

The region is up in the URL of your browser. In our case it's us11.
Let's add these to the function:
Your full serverless.yml at this point should look like:
3. Adding the Rest API to expose Lambda function
So far, we have a landing page and a function. They aren't connected in any way.
We need to expose a live endpoint for the landing page to ping on form submissions.
Let's do that with the rest-api component.
Add the REST API component to the components block of serverless.yml:
Let's break this down.
The inputs for the rest-api component take a gateway and routes.
gateway is the API gateway you want to use. In this case we are using the aws-apigateway component.
routes are the URL paths and the functions that are triggered when they are hit. For a larger REST API example, see the /examples/retail-app here.
${landingPageFunction} being referenced in the /sign-up route refers to the function that we had previously defined. So we are passing a direct reference of the function into the rest-api component. Aka, composiblity.
At this point, your full serverless.yml should look like this:
4. Expose the API endpoint to the Netlify site
Great news! We have all the pieces we need for the functionality we are after.
There is one last step we need to handle. We need to give the live URL to the frontend for it to know where to actually send the form data.
We are going to supply the live endpoint to the frontend during the site build as an environment variable.
Because components have outputs, we can pass values from one component to another.
So we need to use the siteEnvVars input for the netlify-site component and pass it the url output from the rest-api component.
We do so like this:
${apiEndpoint.url} refers to the apiEndpoint rest-api component and it's outputted value of url.
So ${apiEndpoint.url}sign-up will resolve to something like https://3m0ylzhbxk.execute-api.us-east-1.amazonaws.com/dev/sign-up.
We are passing that value into the Netlify site build environment variables with the create-react-app conventions REACT_APP_${YOUR KEY}.
This way, we can use process.env.REACT_APP_SIGNUP_API in our React app's code:
You can see this in action in our landing page repo.
Your full serverless.yml should look like:
Deploy!
We have created our landing page. It's time for the final deploy.
In your terminal run:
Summary
As you can see, with just a couple of components you can have a landing page up and running in no time.
What will you build with components?

