.png)
In this tutorial, we will show you how to build an image hosting app, powered by Serverless Cloud. It is a simple app that uploads your image, and returns a direct short link that you can share with others, or more practically, reference in your markdown & html files. You will learn how to build an API with Serverless Cloud, and how to utilize Serverless Storage to save, serve and resize your images. You can see the final app in our examples folder.
Getting Started
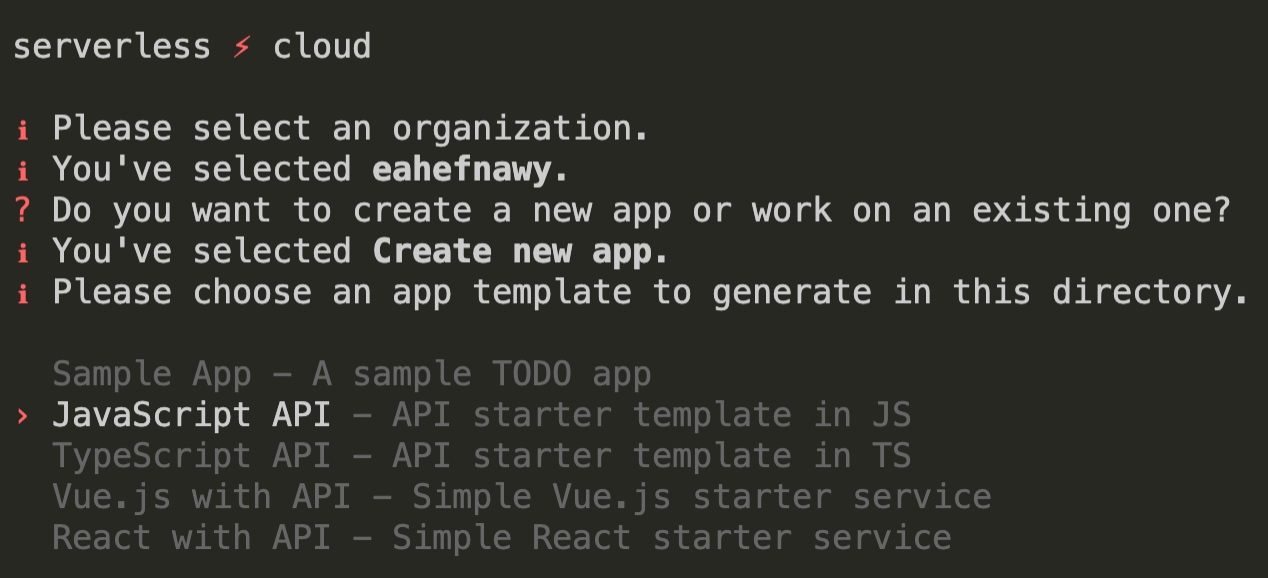
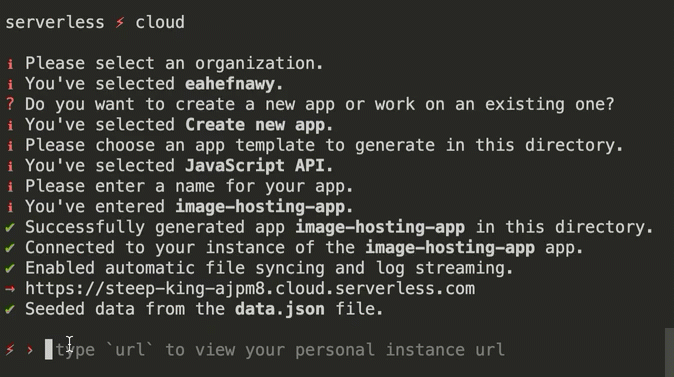
Create a new empty directory called image-hosting-app, then open this new empty directory in your favorite IDE. This will be the directory containing your app files. Then, using your IDE built-in terminal, initialize a new Serverless Cloud project by entering the following command:
You may be prompted to login if you haven’t already, then the CLI will ask you to select a template to get started with. Choose the JavaScript API template.
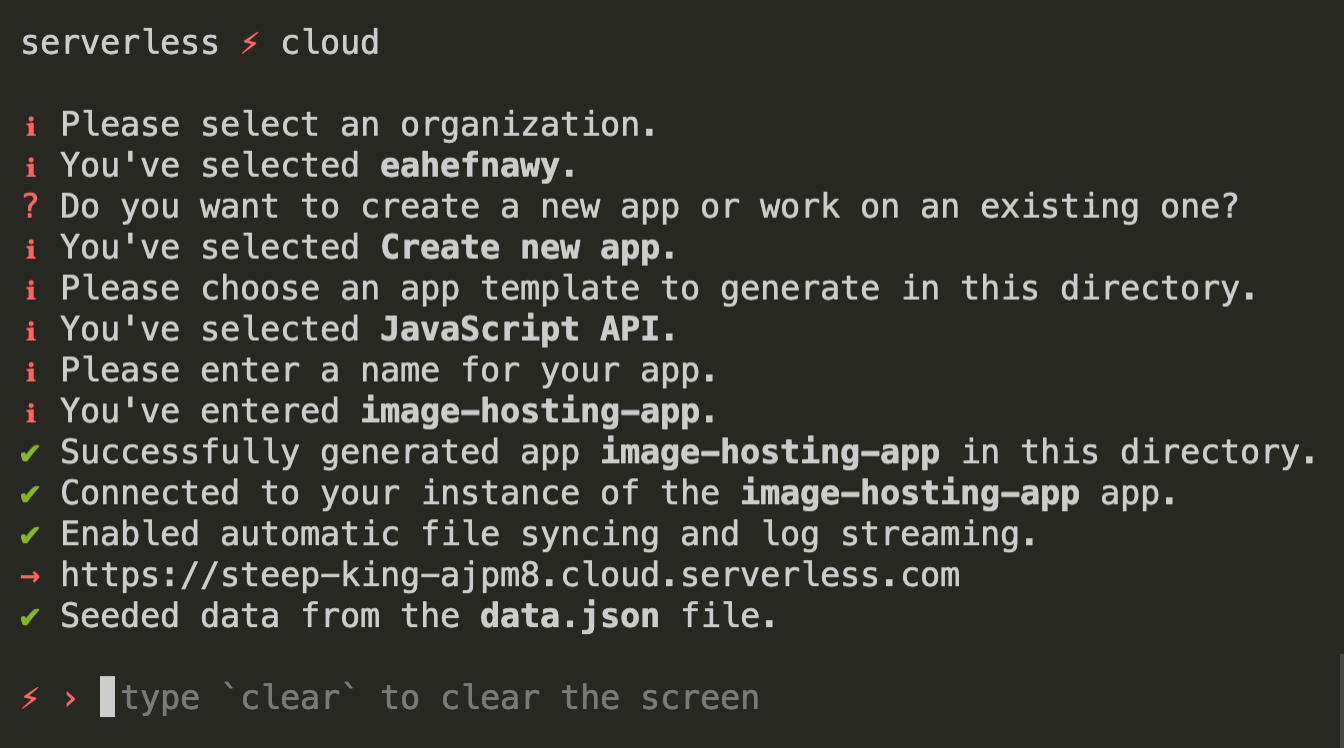
After you make your selection, your new app will be generated in the directory you just created, and deployed to your own live personal development instance. The CLI will also enter a dev mode that will be watching and deploying any changes you make within seconds, while still allowing you to enter commands during development if you need to.
Our image hosting API simply consists of two endpoints. One to upload and save the image, and the other to serve this image when requested. The syntax is very similar if not identical to any Express.js api you’ve worked with, so you should find the code very familiar.
Uploading Images
The `api` interface from the SDK simplifies the uploading process, automatically loading the file into memory for you. Just copy the following code snippet into your index.js file, replacing all the boilerplate code that was automatically generated for you.
You’re now capturing the uploaded image. Next, you’ll save it into Serverless Storage by calling the .write method on the storage interface, and passing it a short random identifier as the file name. This random identifier is how you will retrieve this image later, and how you will reference this image in your markdown files. Your upload endpoint should now look like this:
Serving Images
Now that we can upload and save images, we’ll need to add the endpoint that will return your saved images. It’ll simply grab the image ID from the url, fetch it from Serverless Storage, and directly return it to the user. You can easily achieve this with the sendFile helper method that we’ve built for you on the response object. Here’s what that endpoint looks like:
This is basically all you need to serve your images, but what would be even better is the ability to resize your images with optional query parameters to save on bandwidth and load time of your markdown & html files. For this we will use Jimp, which is an npm package for resizing images written completely in JavaScript. Install it by running the install jimp command in the cloud shell:
The Jimp package is quite heavy, so installing and deploying to your personal development instance may take a few seconds. Once that is done, we’re going to modify our root GET endpoint to accept optional w & h query parameters representing the desired width and height of the image. If they’re specified, we’ll resize the image if it hasn’t already been resized before, then return the resized image, otherwise return the original image as we did before.
That’s pretty much it! Your entire API should be around 50 lines of code, and it should look something like this:
Remember, all the changes you just made were automatically deployed to your personal development instance as the CLI was watching this whole time. Let’s deploy everything we’ve built to the production stage. Just run the deploy production command in the cloud shell:
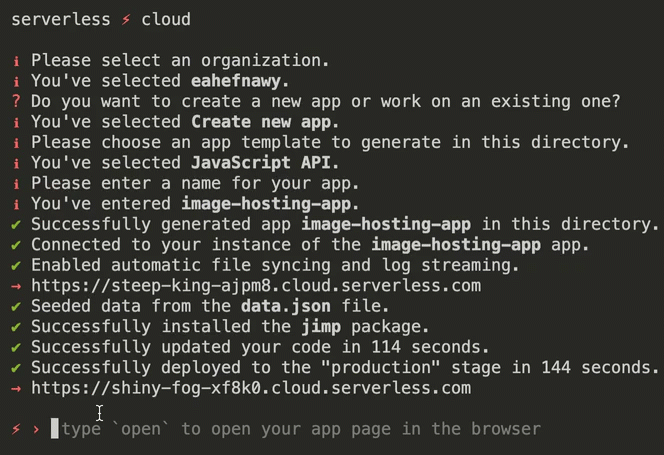
This will return a new app url that is completely separate from your personal development instance. Unless you’re testing, we recommend that you use that production stage url in your frontend so that any future changes you make to your api won’t break your app. We will leave the frontend piece as an exercise for you since it’s no different from any other frontend app you’ve worked with. For reference, you can take a look at the docs, and how that might look like in the examples directory.
Summary
We’ve seen how easy it is to get started with Serverless Cloud. We’ve witnessed the power of the CLI during dev mode, how your changes are instantly deployed and how to run commands in the cloud shell. Finally, we’ve learned how to save, retrieve and resize files using Serverless Storage. There’s so much more you can do with Serverless Cloud that we couldn’t cover in this tutorial, but you should find it all in our docs. If you have any questions, feel free to reach out to me on Twitter.